See J20 and H25/27 engines at end.(new) Twin cams or V6. Up to 2004.
How to check for noise cause.
Replacing them ,the accessory devices too, and curing belt squeal .
The G16 engine timing belt is covered here.
Pulling the starter motor, is relate due to these things in the way.
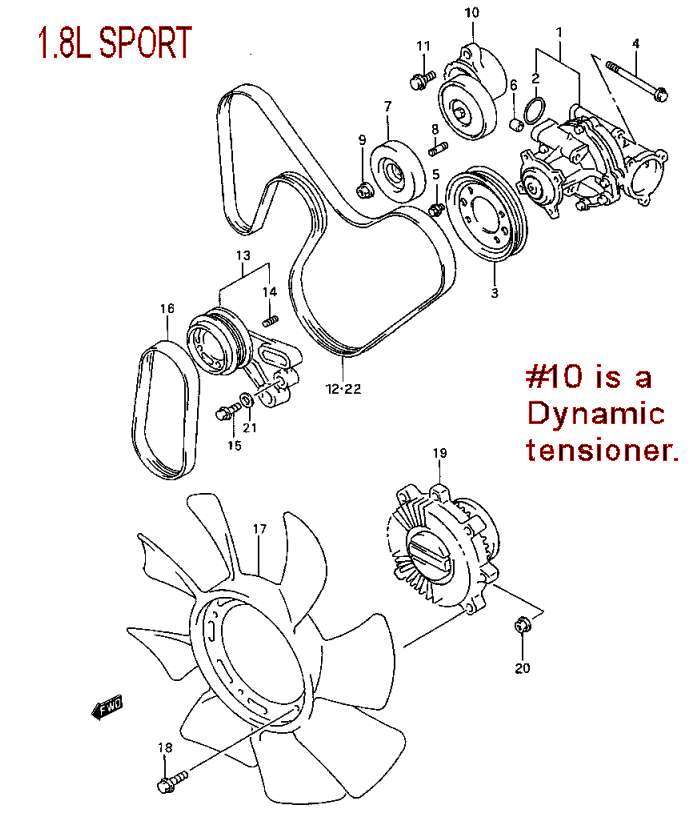
This information covers 1989-98 Sidekicks & Trackers / Vitara's old. and not the 1.8L SPORT , which the latter has a dynamic (auto) tensioner.
The Alt and water pump is automatically tensioned on the 1.8L and the PS & A/C is set similar to the 1.6L below but with a special left of crank tension pulley( with a single bolt adjuster)
P/S = power steering pump
A/C = Air conditioning compressor.
Both are in fact , optional and many belt sizes, due to that fact.
The Alternator and water pump unit devices are not optional.
If any device seizes, the belt will get damaged, for sure. or at least squeal like crazy.
G16 ENGINES:
Squealing sounds?, if the belt is squealing, the belt is loose or the SHARED belt accessory is seized. (yes, feel all pulleys now, if you fail to discover the truth now , you will be stranded)
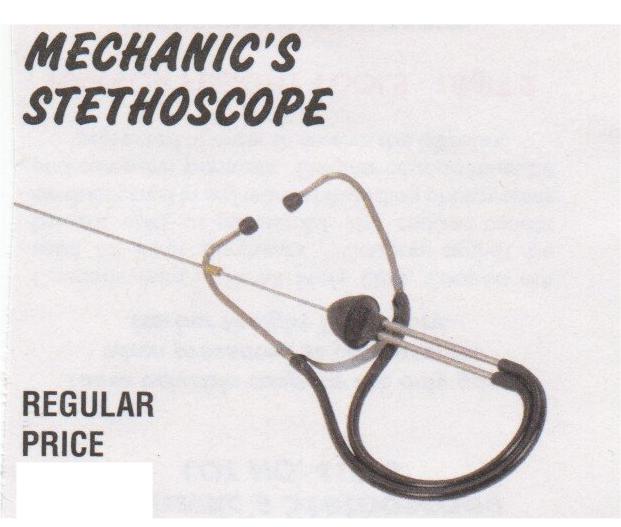
I use a $5 stethoscope (or better) to find any accessory device , that is bad, has bad bearings, or is making huge noises inside, and for sure before long trips (Boy Scout actions "Be Prepared") Do so on a running engine. (no loose shirt sleeves, please)
To find which belt squeals, drop them 1 by 1 on a dead cold engine, for 2min test, and the one dropped running, that stops the squeal, is the problem area,
Now find out, if all pulleys are free to spin, on this belt, if yes, then new belt time, as yours my be glazed. (sure, try belt dressing spray, but that is usually only, a band-aid fix)
Do not over tighten the belts, always drop the belts and feel all pulleys for bearing seize. ( they all must spin free and easy, except the crank pulley of course)
When feeling the action of a pulley (we spin it, feel it , listen and watch it) ( a good bearing feels like a knife through a warm butter block, as spun)
FAILURES ARE: (bearings, Pulleys, Alternator, Power steering pump, A/C compressor or its clutch bearing, water pump or any idler pulley )
- Gritty , bumpy, sticky, rough, not smooth feeling is a bad bearing
- Any axial or radial play felt is bad , in gringo that means , "the pulley must not move up or down, or in or out, it must only move in the spinning direction"
- I spin my pulley now or later, running engine and listen with my electronic ear for funny noises. (if you don't know what normal is , then find a good bearing and listen to that) or this $4 tool
- You can see the bearing seals? and see the grease leaking
out. (a tiny weep is ok) It's bad. Or see seal damage or any
distortions of same it's bad.
- The bearing wobbles. It's bad. The seal goes
bad just after the bad wobble starts.
- I saw a Sidekick
with the water pump bearings, so bad the fan hit the timing belt cover,
cut through it and cut the timing belt in half (sadly, owner ignored the
sounds, for 100s of miles) NEVER IGNORE NOISE on
Never follow this page (the one you are reading) instructions for the cam timing belt or you will destroy the cam front bearing! ( it is set loose, this Tbelt)! SEE HOW HERE:
If one of the Accessories items on the engine makes noise running, (P/S, A/C, water pump, Alternator) you can just listen to it front and back side, (both bearings) with any $4 stethoscope, or just drop the belt off.
Ways ? , cold motor, drop belt , if belt is water pump/Alt, drop it and run the cold motor for 3minutes max and listen. (P/S and A/C no limits for drop)
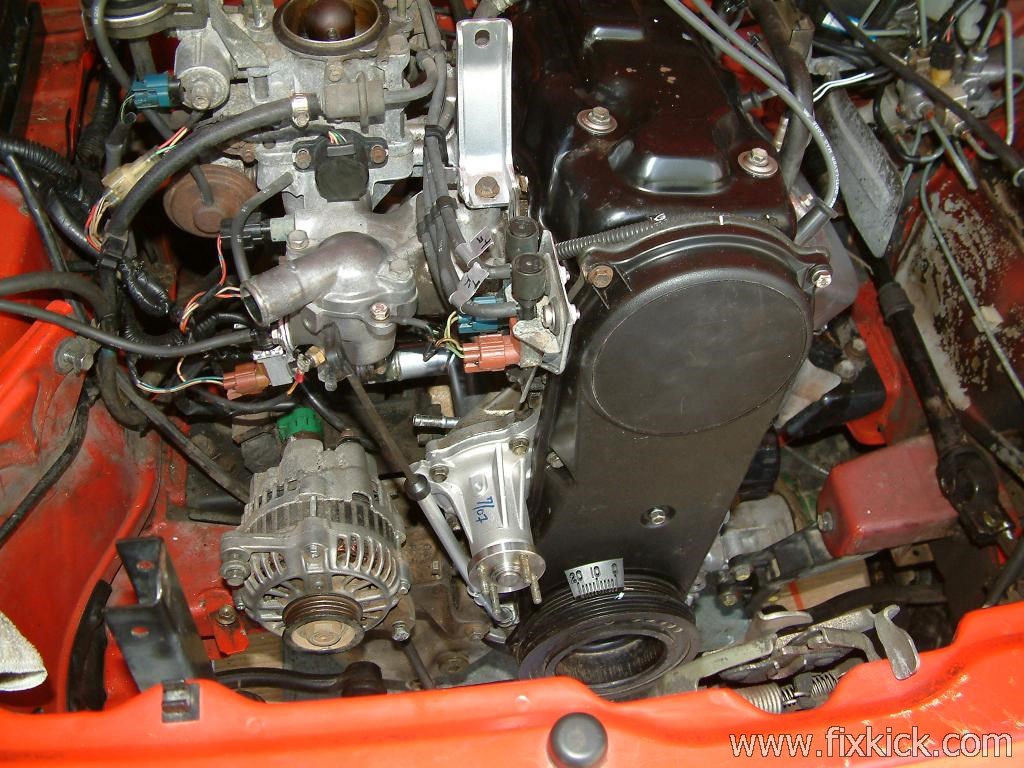
There are 2 belts on the front of the motor.
The INNER belt.
One belt runs the water pump and the Alternator. ( to adjust this belt , tension, adjustment is only at the Alternator top bracket bolt #10)
The outer belt: These 2 features are optional on some Sidekicks . (Vitara's , Trackers, Sun runners, etc) so if you have it , this belt needs to come off 1st before the inner belt. (obvious at first glance....)
The other runs the Power steering (PS) and the A/C compressor.
Tension is set via the Compressor if optioned , but if no compressor option ,then the P/S is adjusted. The drawings below so the tension parts. clearly.
The tension on the belt can be set by hand or a tension gage.
The alternator has 3 bolts , 1 on top #10 for the tension slider bolt and 2 more (#4) at the bottom for the pivots. See drawing #3 below.
Most times you can loosen the top bolt of the alternator #10 and then pry the alternator with a broom handle outboard until the belt tension becomes, on the longest run, per below:
All deflections are after running a belt for 5 min.
THE SPEC !. (factory specifications): 22 lbs force mid span, will cause a deflection of 1991-98' = 0.24 to 0.31 inches [89/90 0.20- 0.32"inches]
A/C P/S belt is 96-98 '0.24 to 0.35" inches deflection. Same 22 lbs force. [1989/90' 0.31"-0.47"] { 91-95 0.20-.25"}
They do sell tension gauges, if not used, you get to guess.
You can imagine a 22 pound ham resting on the back of your hand with fingers, pressing... Sorry, there are only 2 ways. (guess, or tools)!
If the Alternator , P/S or A/C UNITS can not be moved (adjusted) then you must loosen the pivot bolts.
Over tight belts KILL BEARINGS. (more is never better, beyond spec. )
The AC unit has a the same type of mount and adjustment bolt , classic ! It too , pivots inboard, to loosen.
Procedures: (This car has 3 options, with and with out P/S and A/C and all permutations of these. and 3 belts. Don't buy the wrong belt, that be real easy)
If the AC unit is not installed ( shorter belt) then the P/S pump must be adjusted.
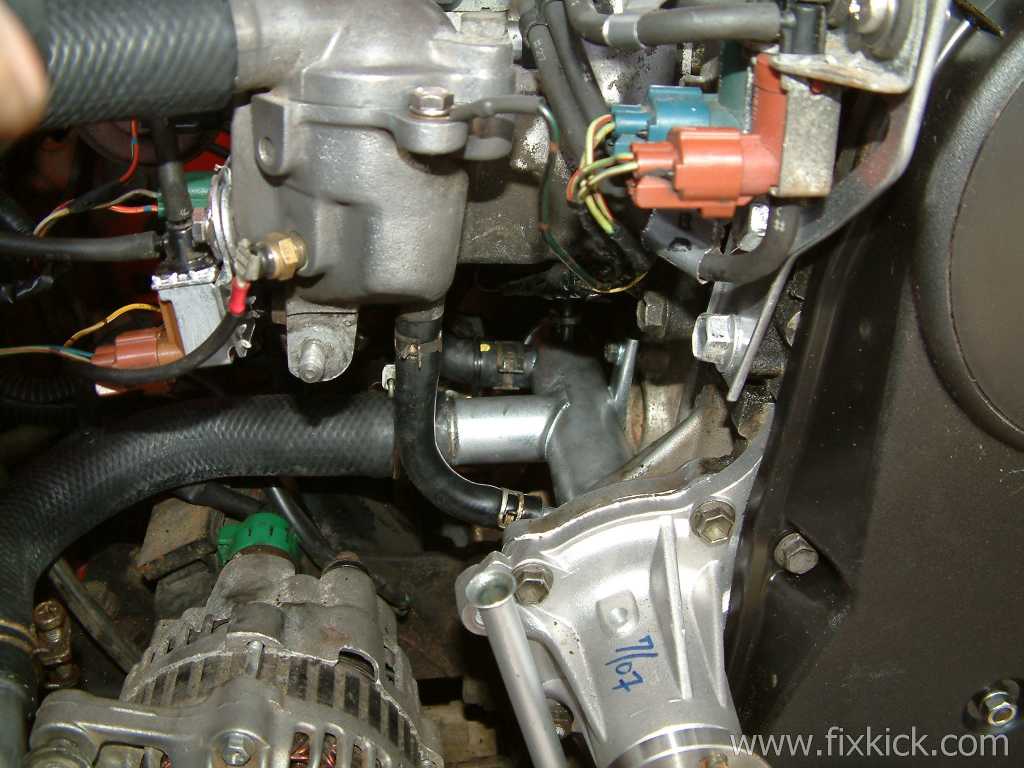
The P/S pump has a hidden bolt see below photo for location.
You must rotate the crank pulley by hand, and its belt, so the P/S pulley has its 2 front HOLES at 12pm and 6pm as shown below, or you can't loosen or tighten the P/S adjuster.
To set any adjuster on any device, it's the same.
Loosen the adjuster (and pivots), pry the pump with a broom handle away from block, and then tighten this adjuster bolt, now check belt tension for the 22 lbs flex spec. mentioned above.
All three DEVICES,.below are done the same way. If you have A/C leave the P/S pump alone and tension , the A/C /P/S belt with the A/C bracket Adjuster.
I'm adding a Pull section to the page, (pull or replace, ALT , PS and Starter , I refuse to cover A/C service besides this.)
- Pull the Alternator? Remove the battery neg lug first. or boom get to eat battery acid or blow the huge Alternator fuse and get to search all over town for a new one......
- Remove the cables (wires) and the 3 bolts its out. Tilt the ALT, inward to release belt at pulley, that is obvious. , reverse above to install and set the tension to Spec,. as stated above.
- To change the alternator belt remove the PS belt first.
- Remove the P/S pump?, drop hoses, drain the ATF fluid, to a pan.
- Remove
the tension bolt and the pivot bolt clearly seen below. To put it back
, the system must be filled and cycled to get all the air out, or it
will make noise. The fsm covers this clearly.
- Remove the A/C compressor.? (say for engine pull) remove the tension at Compressor 11, or if you have P/S at bolt hidden below. In all steps, the pivot bolts are loosened first, to set any tension, then tightened down last .
- Tie the Compressor back so the lines are not stressed, do not remove or touch the line fittings with any tools. This is FREON loop lines under PRESSURE at all TIMES, do not release FREON to the Atmosphere.
HOW TO Remove the Starter. G16 "only" 8v TBI and 16valve MPI (see comments)
The FSM book just says, "remove it." (no real help there) The starter is on the right side of engines G16/J18/J20,H20,H25,H27 engines.
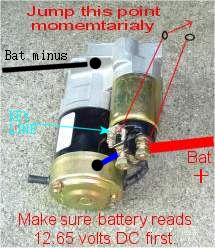
- Pull battery NEG lug, or BOOM
, eat acid if you skip this step.. The starter has no FUSE
making this job dangerous, skipping step 1: (500 or
more AMPS on TAP! respect it !)
- The FSM says it can be removed from below, I tried and could not , unless you are Spider man or Rubber man. The FSM is on the books page. read it, and laugh. (says unbolt it, end story)
- Remove the EVAP Canister, box right/front of engine bay location. (8v has 2 bolts my 96+ just has plastic, guide, and it just pulls out.
- Drop the Alternator belt. (per above, see TILT?) no need to mess with outer belt at all.
- Now tilt the Alternator the other way, as seen here, to the fender side. As seen here too. (even removing the ALT, fully if you have big arms can help, after all your sizes MATTERS)
- On the G16B engine MPI there is a huge under intake
manifold brace, that is kinda blocking front access, this too can be
unbolted on the top and tilted out of the way, if arms are too large or
HAM sized ,hands.
- Remove all cables from the starter solenoid (top of starter) the big one outboard. and the tiny wire, pull off this spade lug (key line) "called "Fastons" in the Elect. business.
- Remove the 2 starter bolts, using socket ratchet extensions and or swivel sockets, (normal mechanics, tools box's all have these tools )
- The starter is out. reverse above, to put back. Do not fail to put the battery ground cable lug back on the starter top mount bolt. (either one.)
- Put the #2 above lug back , dead last.
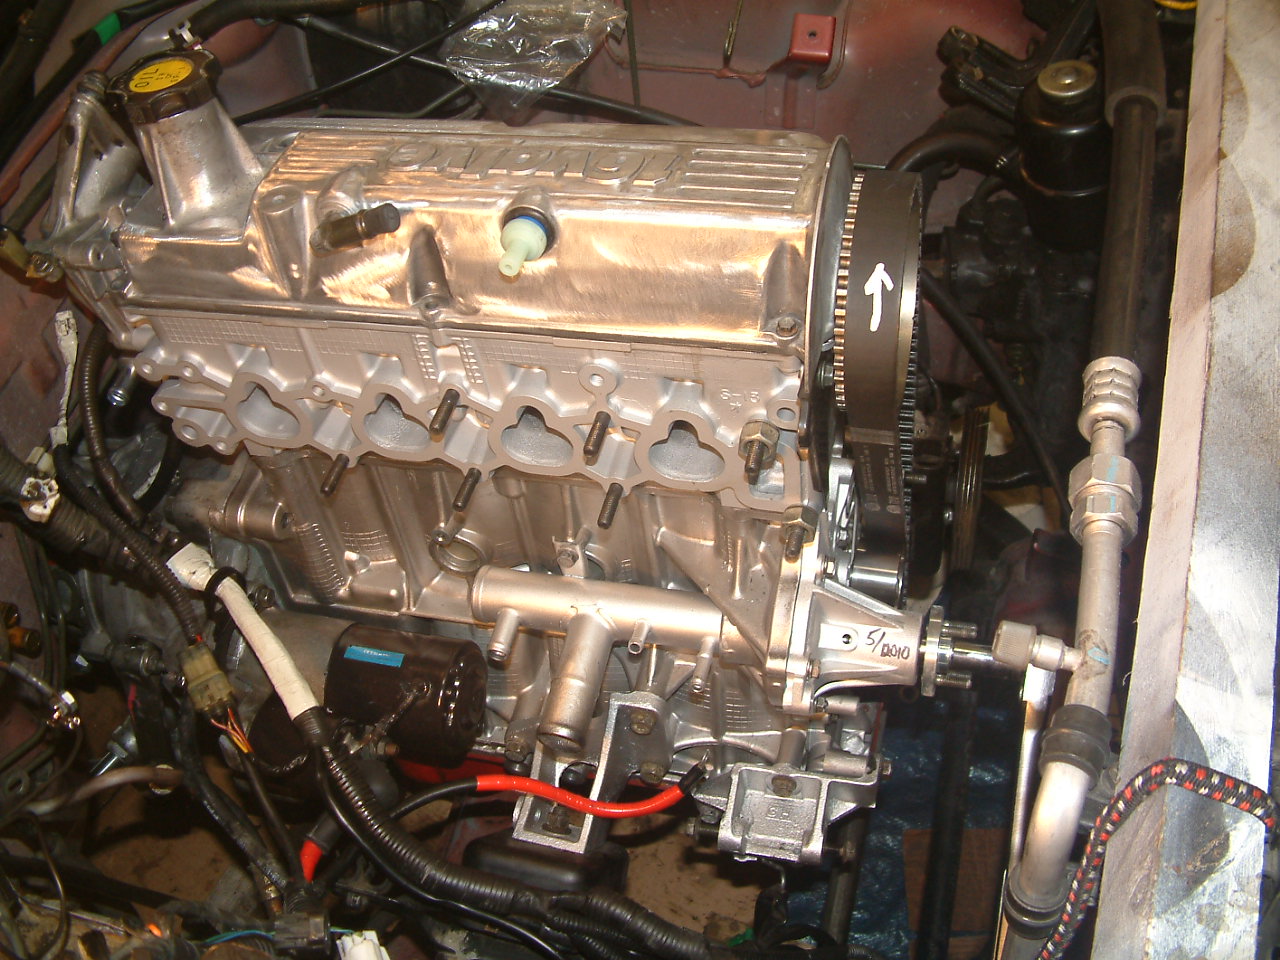
The below is a G16B engine 1997 (new) MPI with new starter. There is no need to pull the intake manifold. This photo is just for CLARITY.
Drawing 1:

Drawing 2:

Drawing 3: The Alternator.
 Some said "how to get the the rear #5 bolt, answer, with box end wrench, from below, see it here.?
If the car has the factory optional front brush engine guard, pan, Sure, it must come off, for lots of service, and above is one.
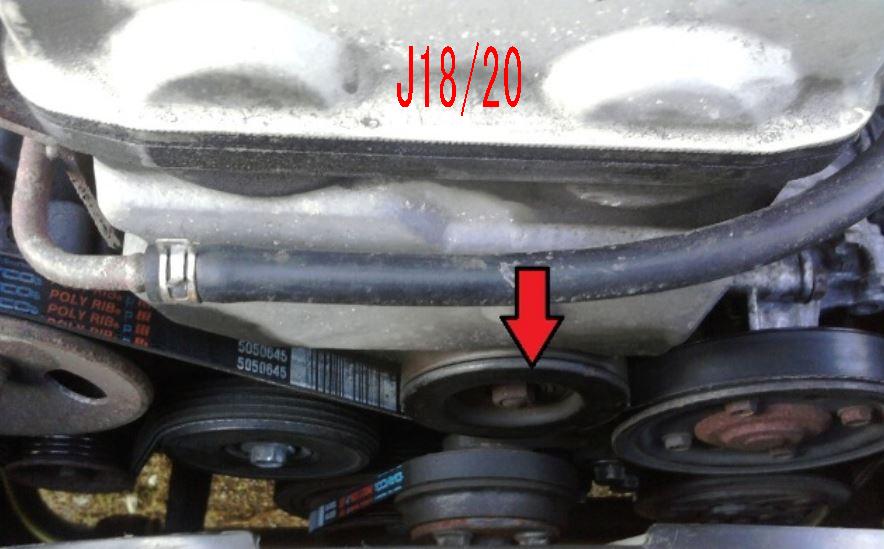
The J18/20 I-4 Twin cam engines, have a spring loaded (blue arrow below) serpentine belt. It has no ADJUSTMENTS. ! It has just one belt.
You must mount this idler, and then tilt the pulley with a wrench on front bolt. TILT PULLEY, PUT ON BELT , RELEASE PULLEY, DONE.
Seen from top:
 rear side, too see the front bolt, see this view.
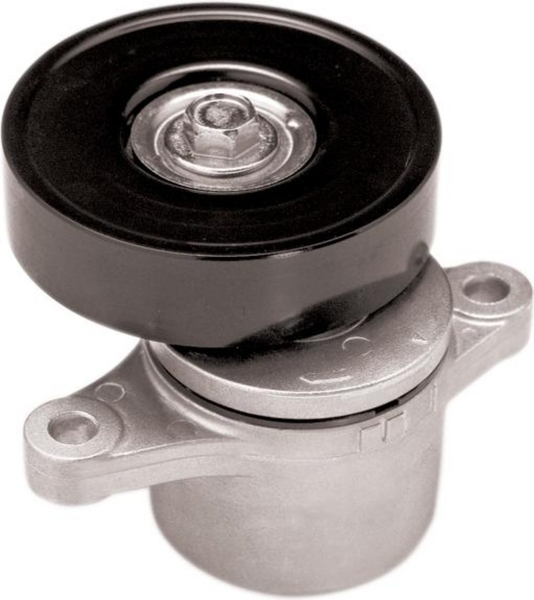
The blue arrow is the magic spring that gets weak with age. (& 10x faster, when from China)
The H25 engines, here, state side, has 2 Serpentine belts.
One for the alternator, (water pump) and one for P/S -A/C belt.
The Alternator belt is set just like drawing 3 above. just like the G16 engine using the SPEC 7-11mm deflection of belt mid span, at 22 lbs force. (both belts spec)
One guy I know, uses his fish scale to do 22lbs. (be inventive here)
P/S:
But, the other side belt, the P/S side, there is a manual tensioner, device, and idler with no springs inside (as seen at J20 blue arrow above)
This must be set just like the alternator tension, but the idler has two 12mm bolts (head size) and are both loose to set tension, then tightened and locked down.
Tighten left (facing) bolt first. (obvious?, I hope) The spec is above in RED.
Now the J25/27 P/S A/C belt . Viewed from top?
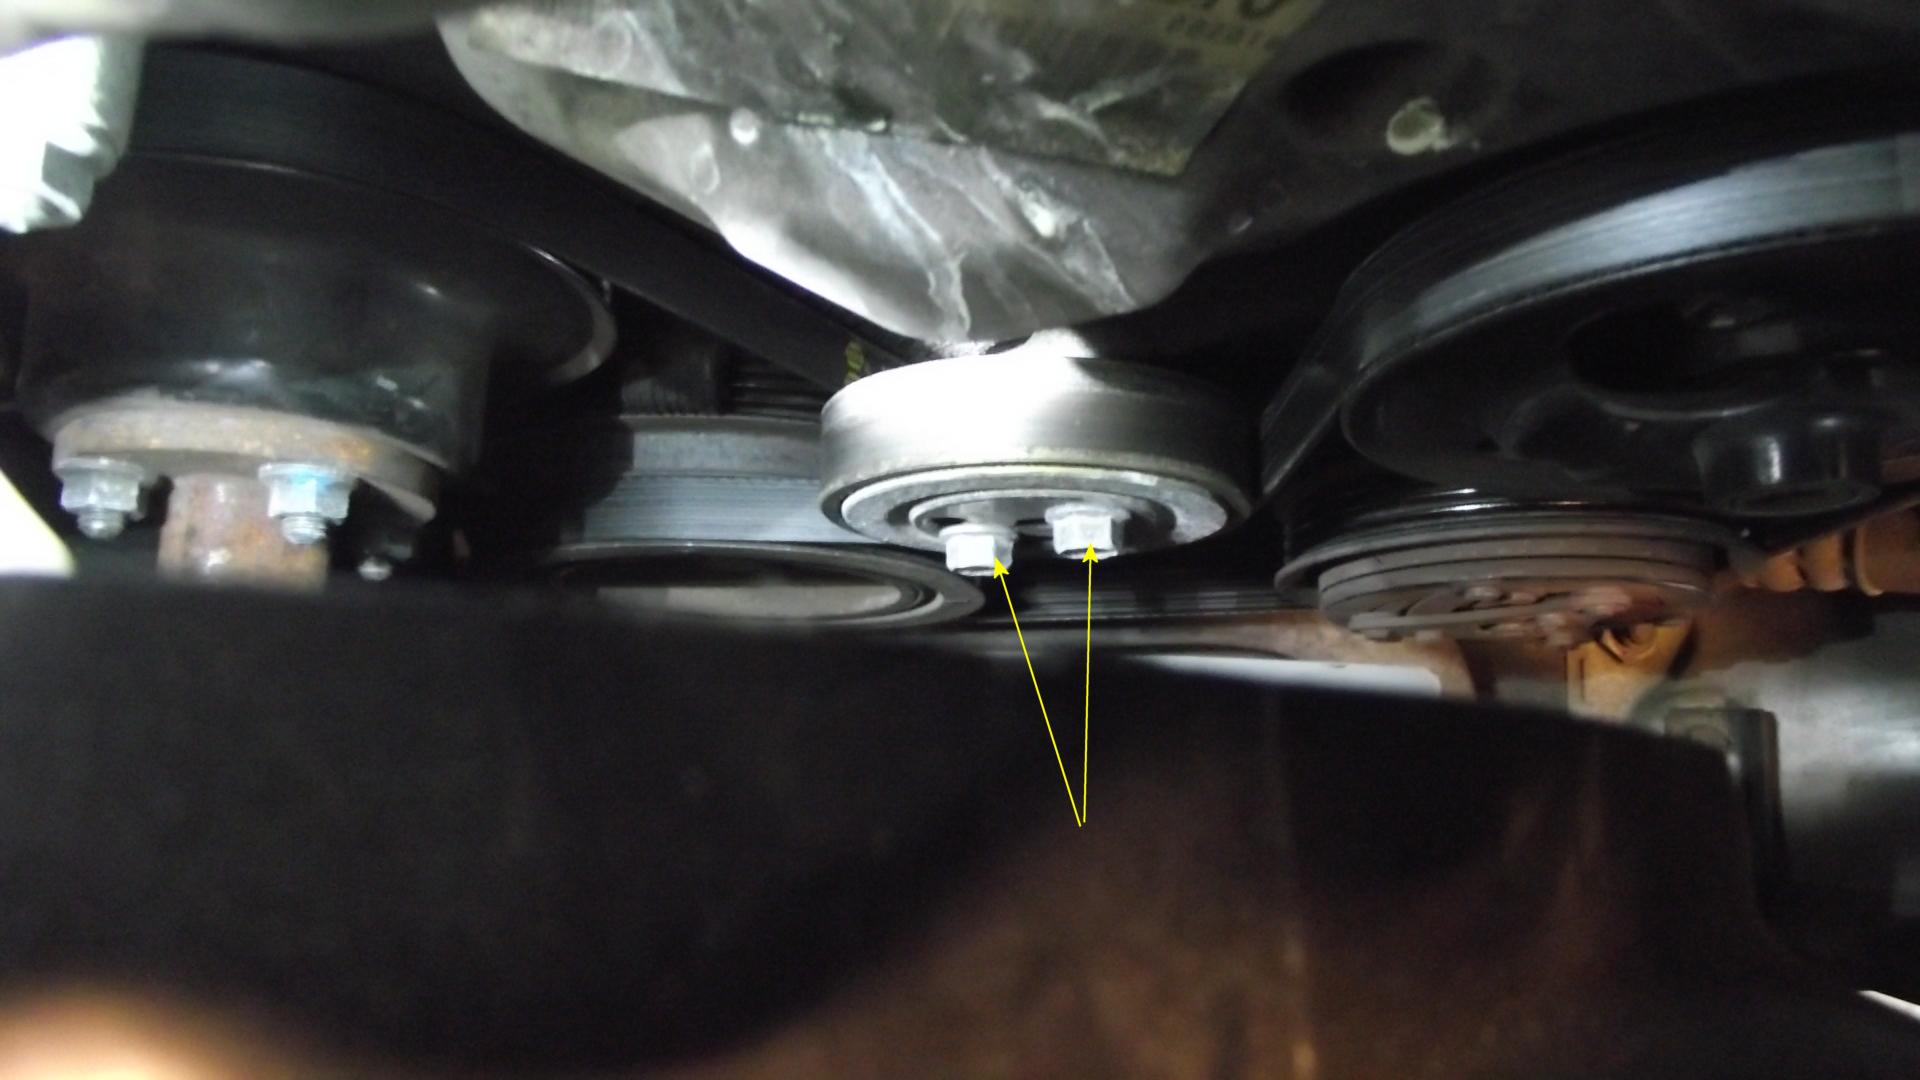

Bolts are 12 mm heads, Allen wrench is metric, as is WHOLE car. There are NO SAE inch bolts on this car, NADA !
The Allen hex size is: 10 mm. (IIRC , if I remember correctly) Getting to here, is not easy, Note cracked belt, get at Good year, Gatorback belt. do not run cheap belts. (life is really to short for imported trash belts from fleabay, )
NOISE?: ($5 buys a cheap stethoscope at Harbor Freight )
If you touch this tool tip to the bolts above and it purr's? it's ok!
(and to other accessories on engine, same deal) for $5 !! If they all sound ok?, the belt is bad.
Best products: How to hear noises on all bearing on the whole car. Cheap and easy. about $34 if you look around.
My Steelman 97220 is tops.
My Sonic Ear ( works on all bearing devices ,axle , all, and on valve cover to hear lifter noises. or front of any chain cam to hear early signs of death up front.
Listen to all accessories, even the water pump, axles (3 ends), transmission front , rear?, transfer cases. even find a relay that clicks or buzzes and not sure where. This tool is one of the best tools made. bar none for noise.
I threw away the buds and got real head phones at walfart.

Alternator DEAD?
Parting shot: check all bearings of all accessory devices, for bearing noise using above tool, or grinding feel, or looseness. (if yes, it's bad , replace it) Good bearing feel (new) like a knife through peanut butter. or free runs, quietly.)
Engine will not crank over, NO Crank?
rev.6 -----------2-1-2012 (added how to pull the alt, and starter. (should be obvious but seems not) 9-19-2014 (more facts on J20 and H25 engines.)