
Top way for A/T cars
is
Visegrips ® the flywheel edge. locking it to the bell housing. (under inspection plate on bottom of Bell)
To remove or torque the front 17mm front crank pulley cog bolt.
It all depends on, if engine or tarnny is still in car?
5 Speed manual trans mission, use 5th gear (never 1st or Reverse ) If the clutch is bad and slips, then use the A/T methods. (Automatic Transmission)
I will show photos for better clarity !
Step 1 in all cases but the last , disconnect the negative battery lug and hide car keys from the unknowing.......????
Tranny out.
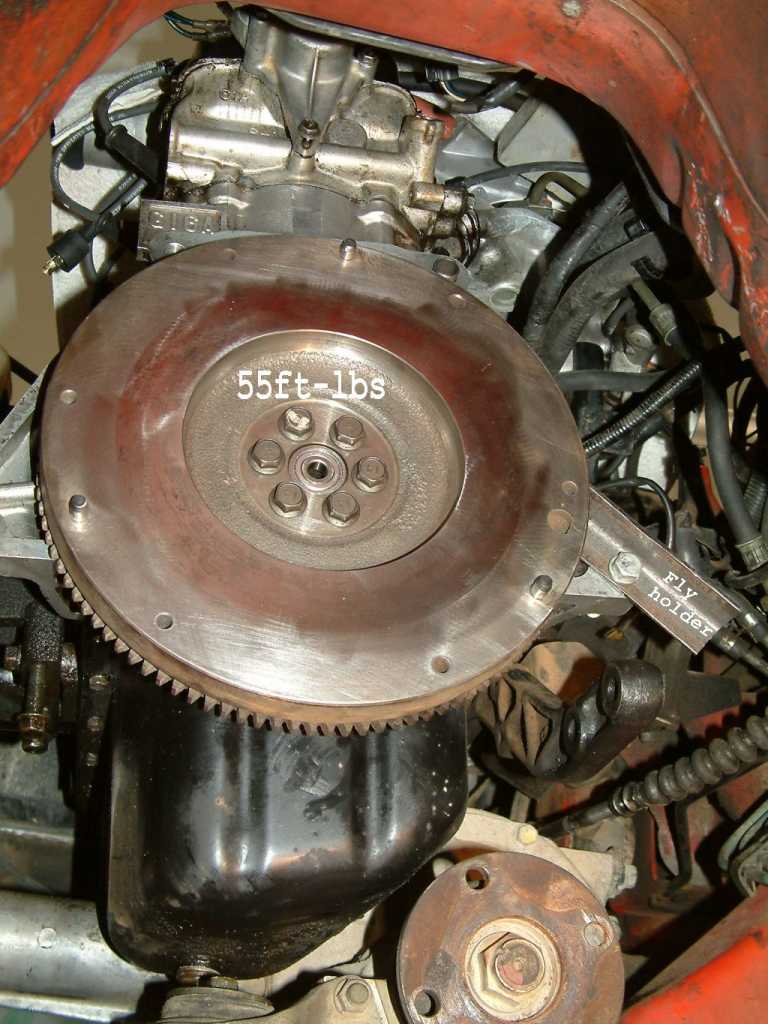
See lock at 3pm?
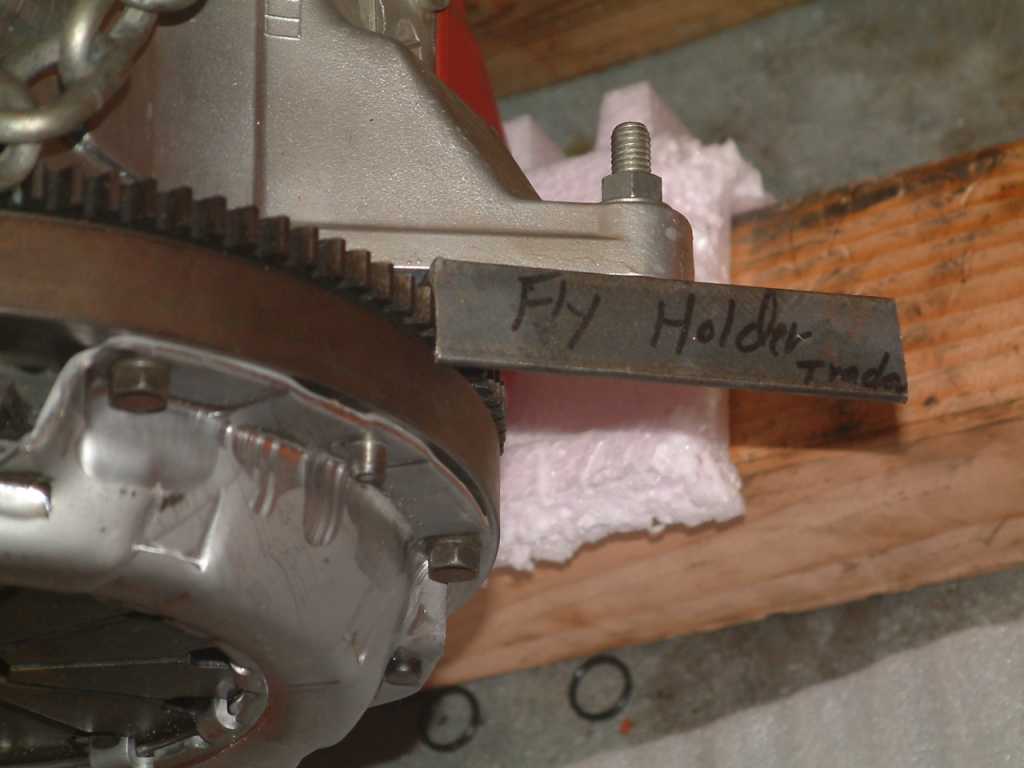
5 minutes in a vise, cut angle iron, and drill 1 hole.
Factory tool is J35271 (tranny out only) ( $80) mine is $1
See the Details of above better here
Engine out:
Engine is in the car for all the following or the clutch slips bad....
The factory Lock. (fly to bell housing.) Engine and tranny installed in car body. Fly wheel inspection plate removed.
 A stock photo, not our year
range.
A stock photo, not our year
range.The correct GM p/n for 89-98 1.6L is , J3571 (unobtainium in 2011) year long poaching on fleabay can work. GM P/N J35271 (motor removed locker) (GM books mix the numbers ! watch out.)
Above photo fits newer generations of Suzuki cars,
See chapeter 6A , here for methods.
Suzuki real P/N.:
Engine out locker is 09924-17810 called fly holder
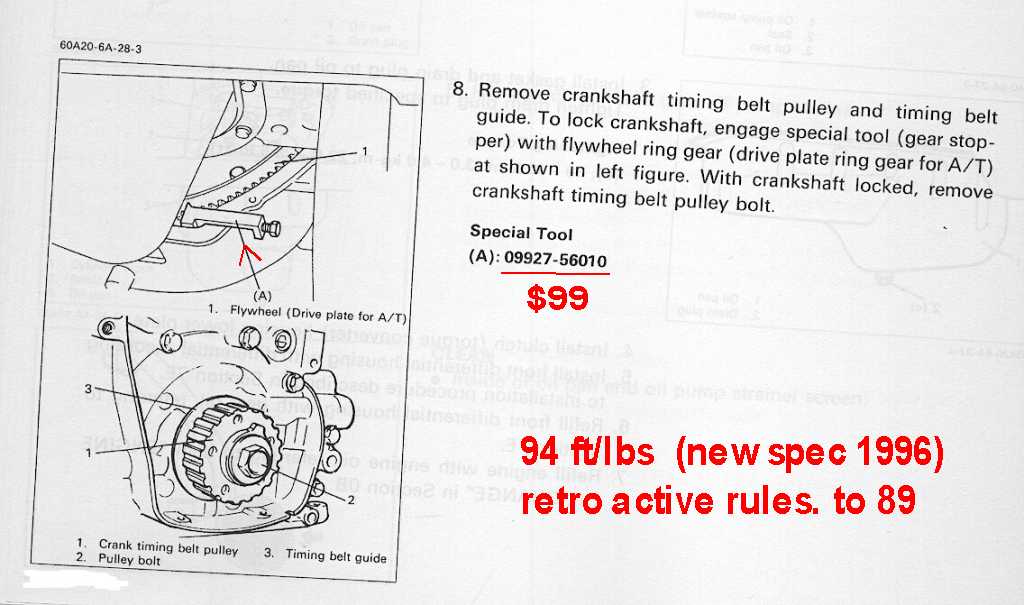
Engine in locker is 09927-56010 called gear stopper. here it is , at pitstop $99 smackers !
Actual tool shown here ,with inspection cover removed.
DYI ways:
Some guys just jam a huge screwdriver between inspection cover plate removed and between fly and bell housing to lock the Fly.
others use Visegrips(tm) but the gap is small and my not work on Suzuki's. I use WAY #3
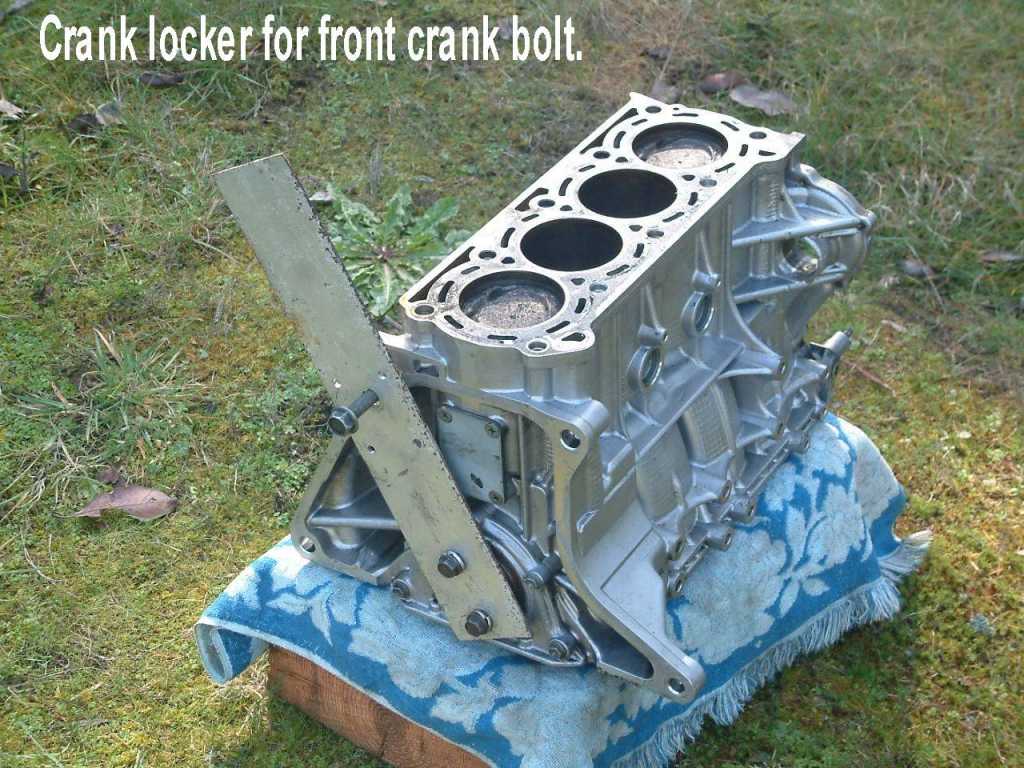
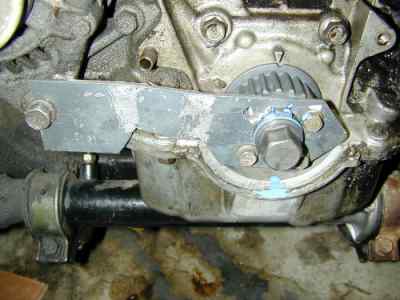
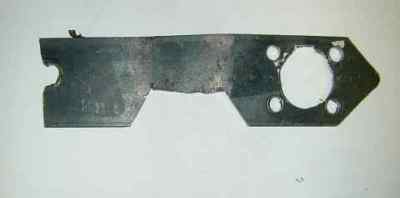
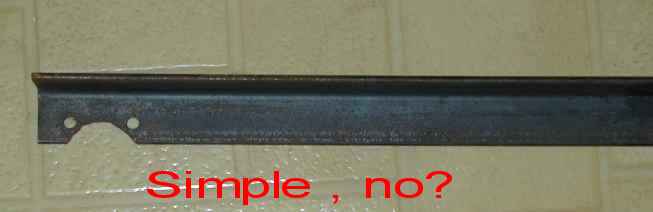
The home made crank cog lock. (a highly recommend way by me)
The below can be made from steel or aluminum and can be make just half way, one could cut a line horizonatally and must make the upper or lower half.
I used grade five 6mm bolts, if using under 5 to secure the cog side on the right. USE M6 bolts grade 8.8 or better !!!
Way #1 (not a kick motor here, but my tool fits my MX5 and my KICK)
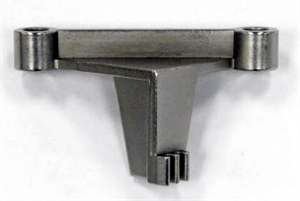
See DIY too, by itself , here.

Way #2
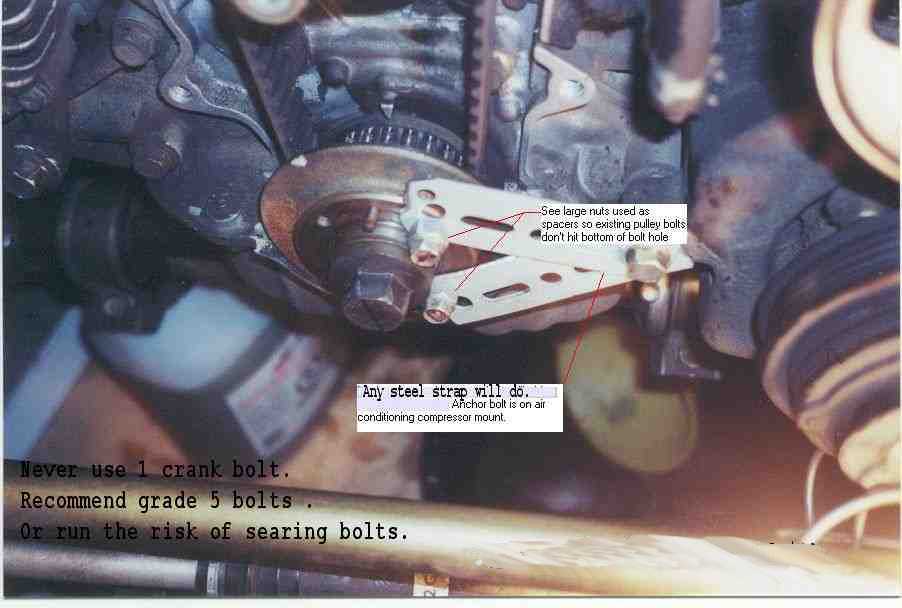
WAY #3 , my best attempt at simple and I do use grade 5 , 6mm blots, for sure, hardest bolts in store ! cut bar to length to fit P/S mount, or A/C or ?
The stuff rope in the cylinder trick. ( why take chances on bending rod?) Shown for completness. ( I love watching)
No photo, imagine a rope dangling out #1 front spark hole .
#1 cylinder ot BTD (bottom)
Insert poly rope (never hemp) till can go no more
rotate crank CW or CCW as the case may be CW = intallation, CCW = removal (counter clockwise)
I think the rod might survive up to 150 lbs of torque, but not sure. (200 is my guess at design max)
YMMV !
The use the starter trick ( can be very danagerous and can strip the crank snout) This is Crazy . I hear it is popular. I will watch from across the street, thank you.
Used to remove the 17mm front crank cog pulley bolt .
Insert the 17mm deep wall socket on to 1/2" breaker bar.
lay the breaker bar (use water pipe for bar extension) on to the left frame rail ( left is drivers side LHD, left is passenger side on RHD cars) Left is drivers perspective , no matter.
Now the scary part. (all bystanders, GONE !)
Blip the starter with the key , for 1 second. (sitting in drivers seat, no remote starters here. )
Bang bolt is loose. My are you not lucky.
Bang wrench busted, or ?
Bang crank snout threads stipped (oops someone used locktite extra hard red code , and you forgot to heat bolt to 300F)
oops, fate is cruel mistress....
YMMV !
rev 1 ++++ 4-10-2011